Femøren by Sanne Bjerregaard
Since making the Belle Vest, I’ve been on a bit of a hunt for another vest pattern to make. When I saw Femøren by Sanne Bjerregaard I knew that it was the perfect vest project for some stash busting!
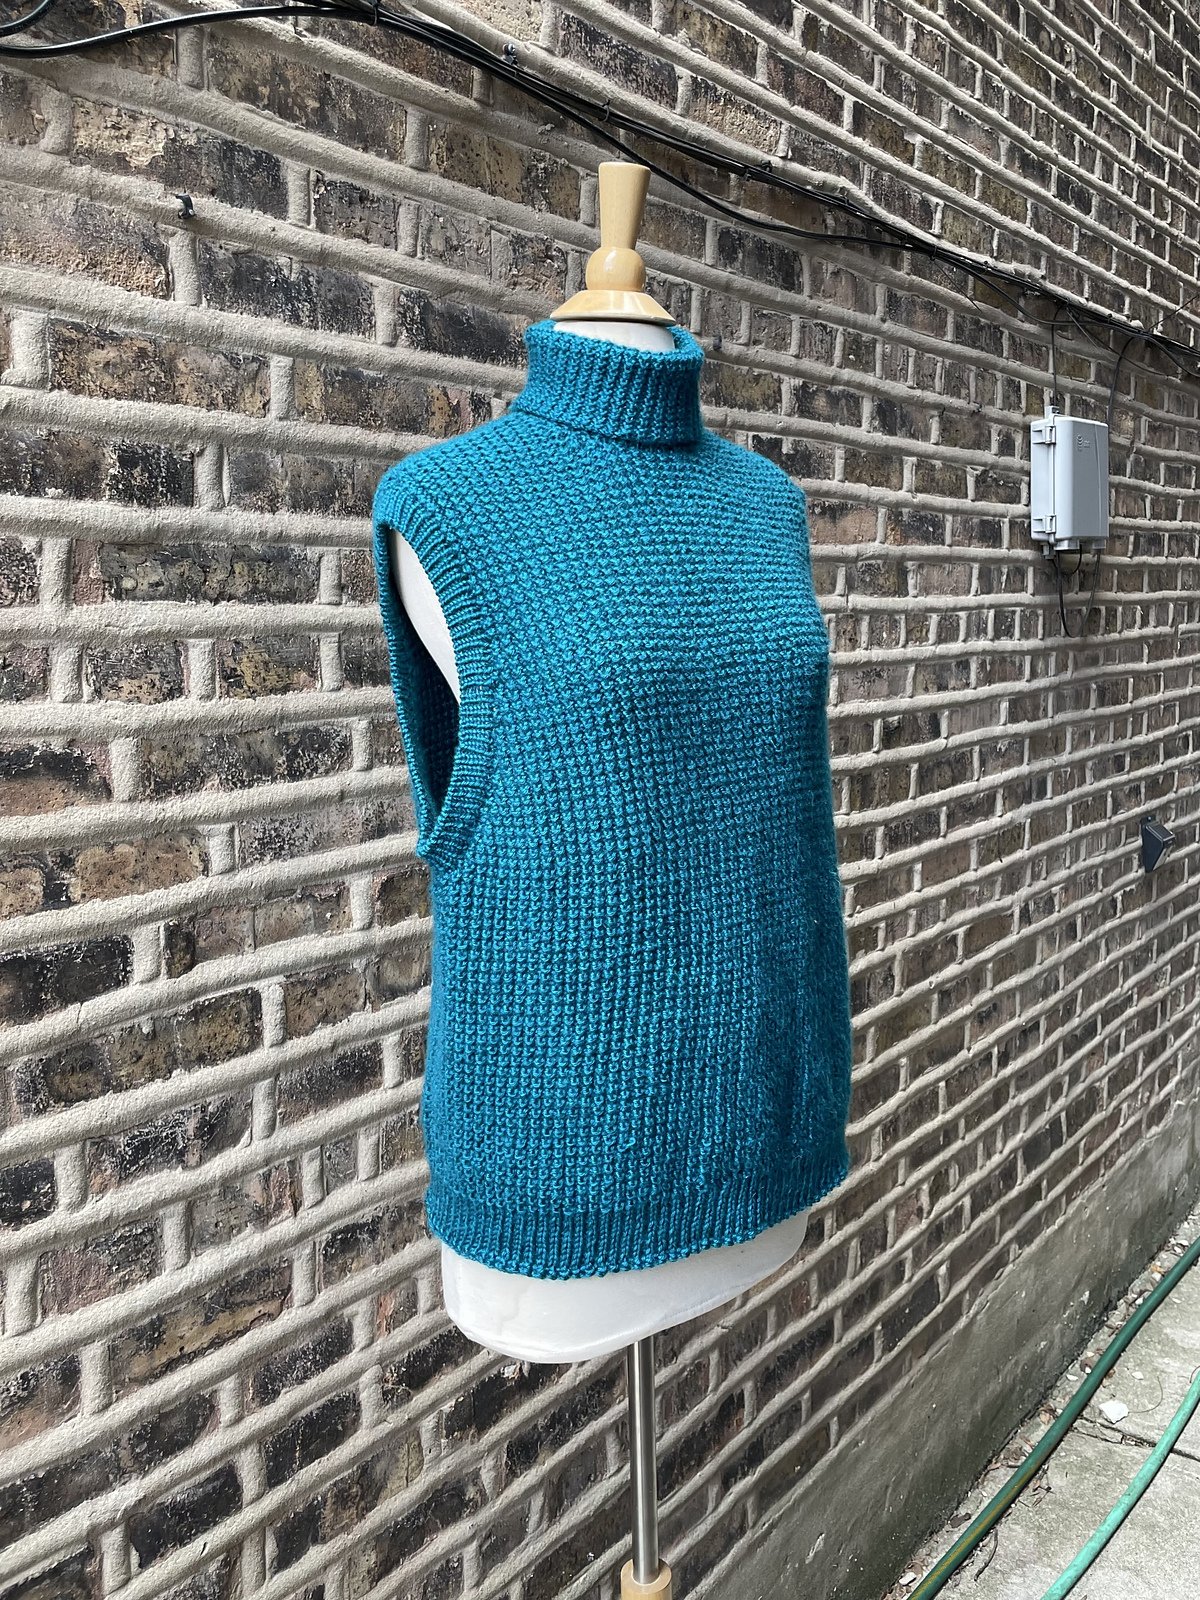
I have had three skeins of Caron Simply Soft in Pagoda sitting in my stash for nearly four years. I received this yarn as part of a Reddit Secret Santa many years ago, and it has just been waiting for the perfect project to come along. As a bonus, teal is one of my girlfriend’s favorite colors, so it was great to be able to use it in a project for her!

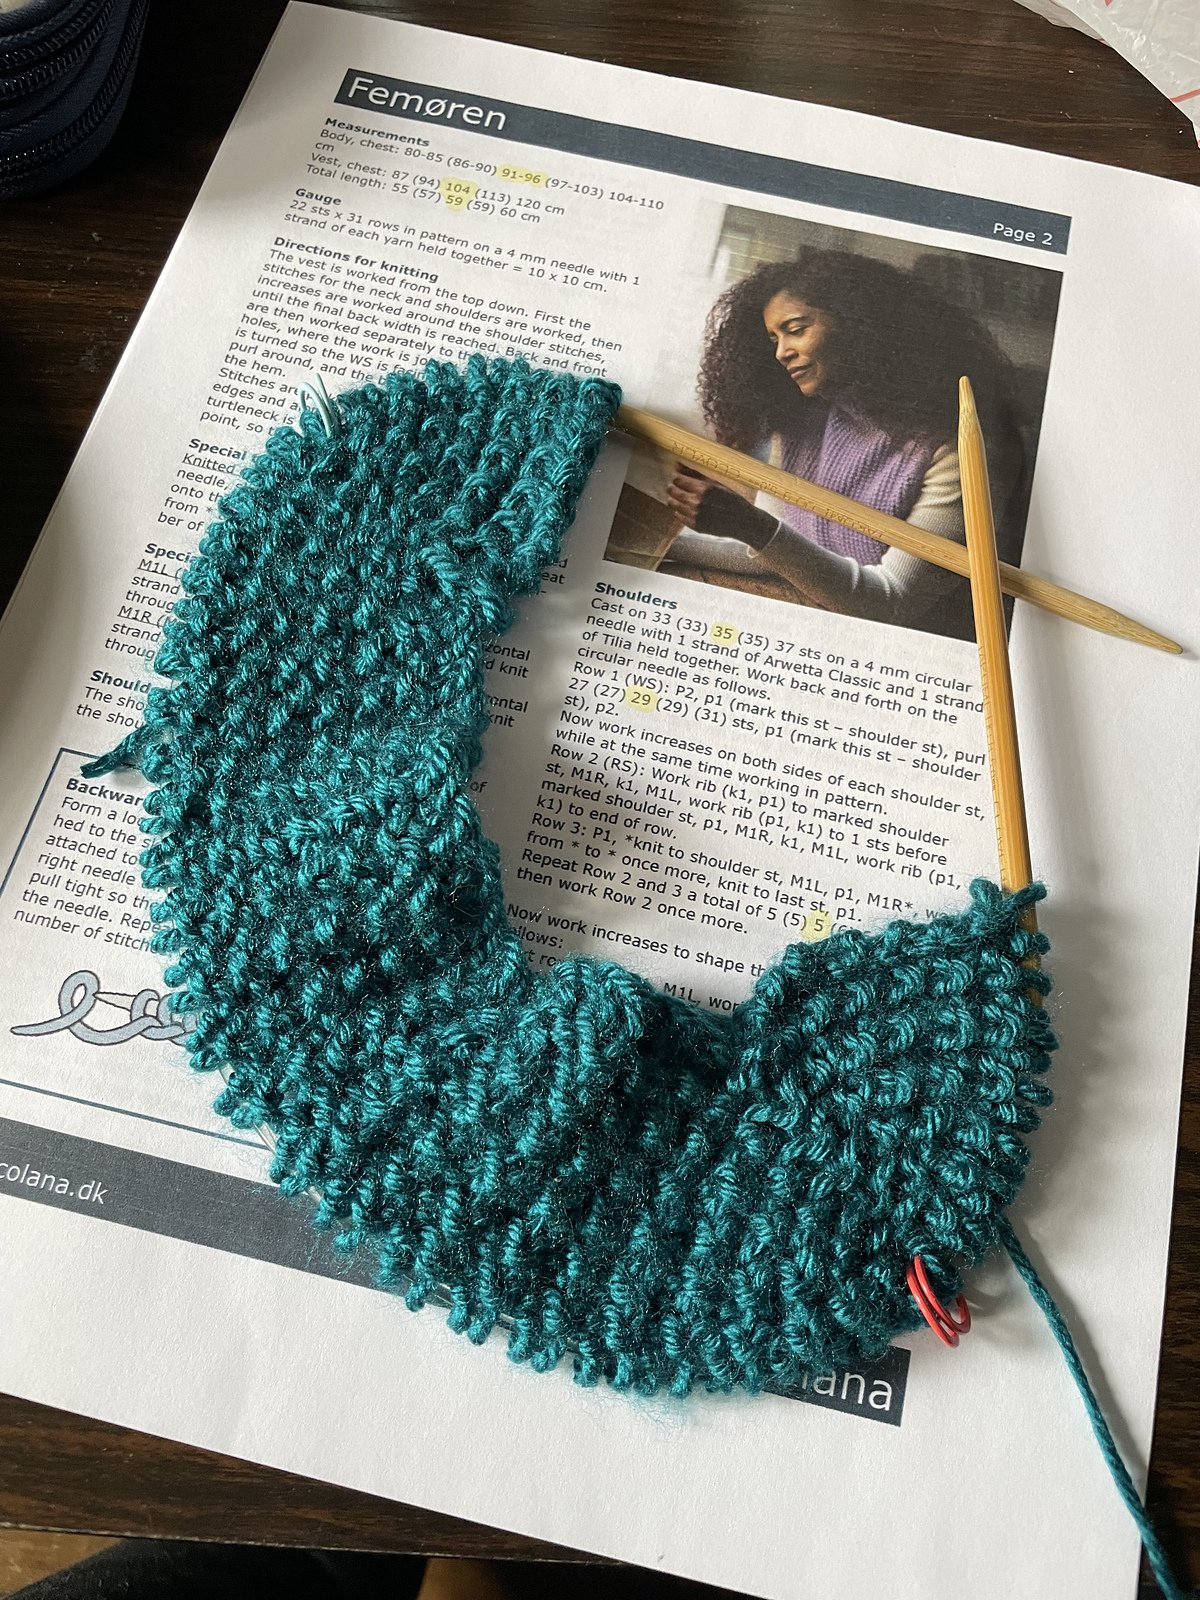
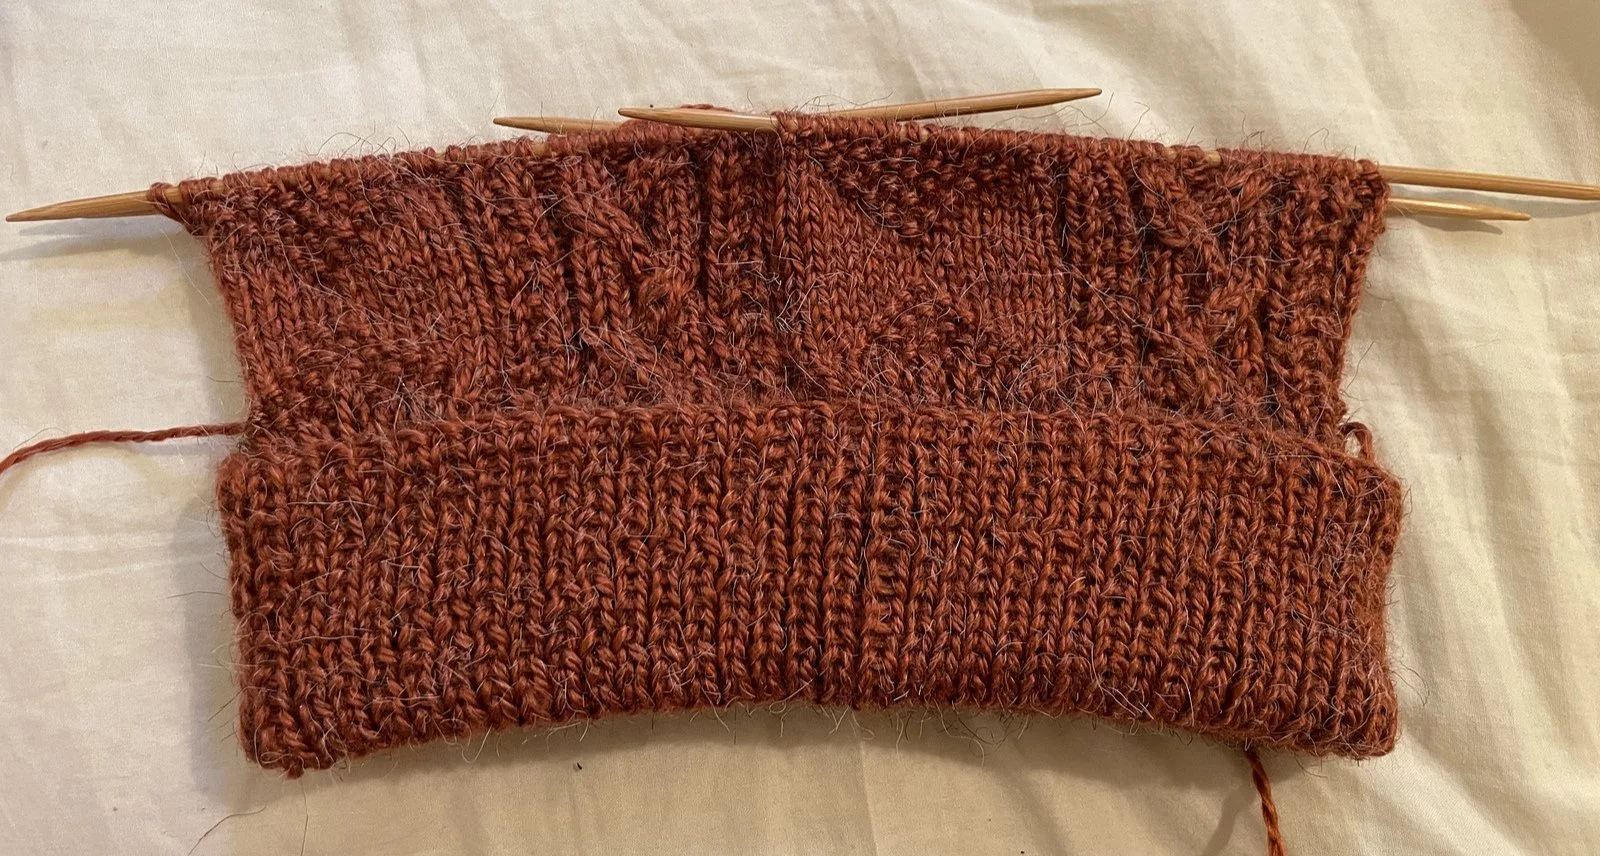
Always do a test swatch!
From swatching, I was able to determine that I should use 5mm needles for the body, and 3.25mm needles for the rib. I knit rather tightly, so predictably, I sized up both needles. I liked how my swatch looked so much I ended up keeping it! However this means I have to figure out what to do with my growing swatch collection…
Humble beginnings
This vest was knit top down. Generally, I have preferred making sweaters and vests from the bottom up. In my opinion, it it a lot easier to do neck shaping when the garment is worked flat. This vest, however, used a new technique that I hadn’t seen before. Every other time I have knit a top down sweater, I have cast on all of the neck stitches in the round, worked the ribbing, and then done shoulder/neck shaping. For this vest, about half the neck stitches are cast on and the piece is worked flat. Stitches are added strategically for neck and shoulder shaping until the fabric is long enough to be joined in the round, making both the cast on edge and the sides of the work into the neck hole. The collar is picked up and knit at the end.
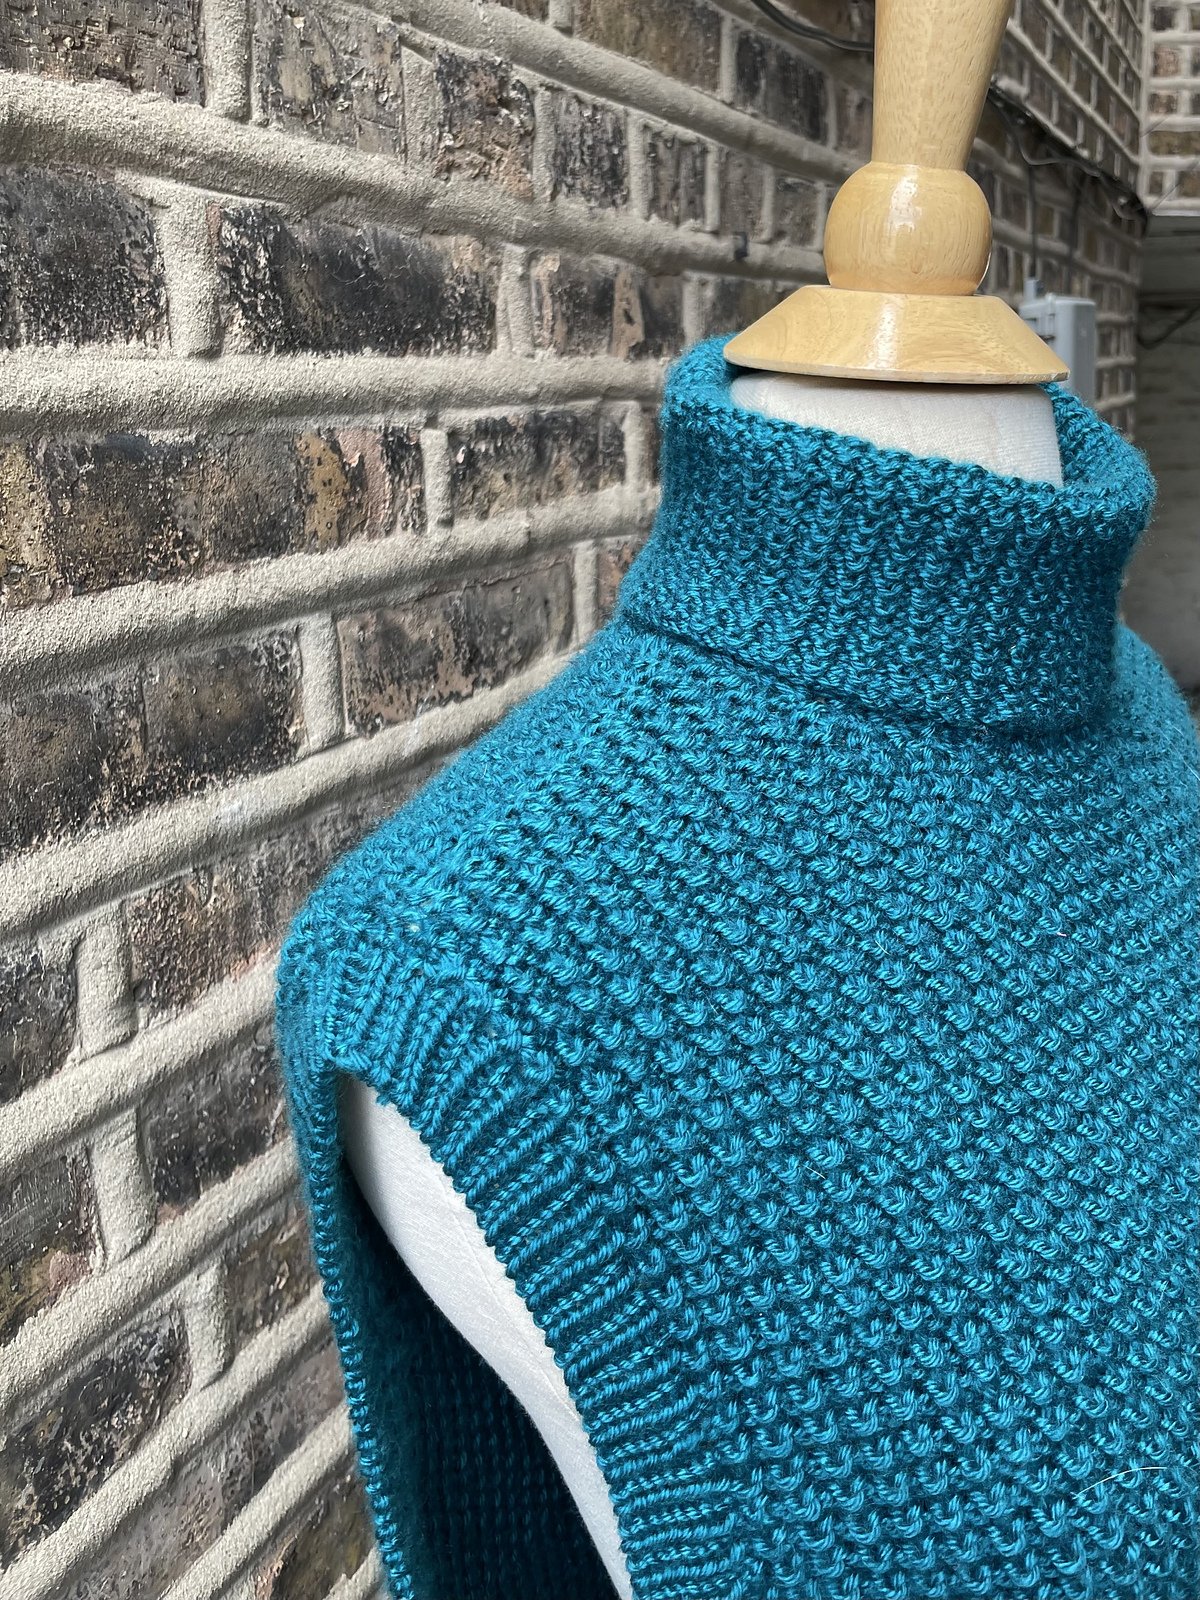
At first, I found this style of neck very confusing and wasn’t sure if I was even going to get a garment out of it, but I persisted and it started looking more like clothing as I went. The result is some of the best neck shaping I’ve ever had on a top down sweater, and a very clean look to the shoulder. Now that I’ve done it, I think this would be my preferred construction method for a top down sweater!
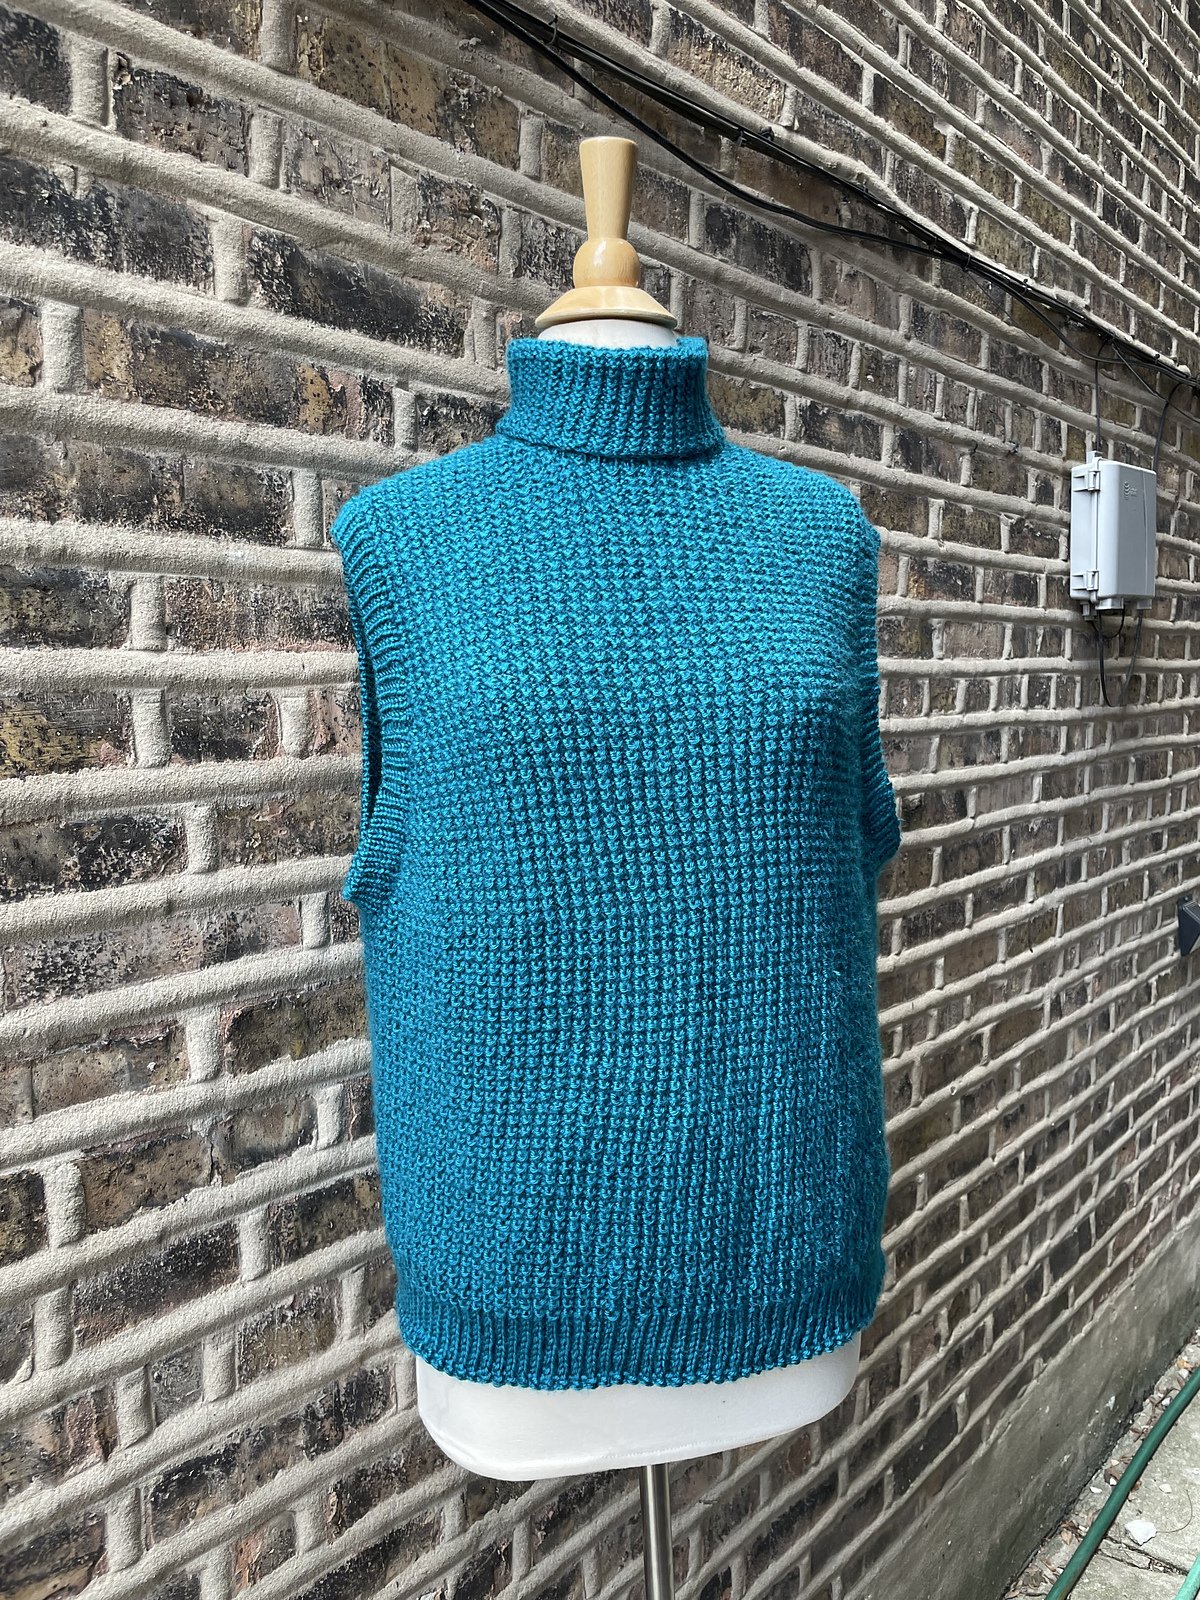

The only real deviation I made from the pattern was to use the larger needles for the rib at the bottom of the sweater, and to use a stretchy bind off for that edge. I did this because I didn’t want the bottom of the vest to cinch in and instead to hang straight down.

My kitty, Macklemore

My friend’s kitty, Phoebe
I really can’t figure out why, but this yarn seemed particularly attractive to the cats. My kitty would not stop trying to lie on it at every opportunity. When I brought my project with me to work on at a friend’s, THEIR kitty kept playing with the ball of yarn! I know that some cats can be attracted to plastic, which 100% yarn technically is, but I’ve never had this reaction from any other acrylic yarn I’ve used. If anyone has insight into this, please let me know, I need to know the science behind this.
the Belle Vest by Rita Marques

Recently I had the opportunity to test knit the Belle Vest by Rita Marques. It is a cropped boxy fit vest that is knit from the bottom up. I would consider this a great pattern for someone considering making their first sweater. Yes, it doesn’t have sleeves - but I think this makes it better for someone just learning to make wearables. The pattern itself includes links to video tutorials of techniques, which is fantastic for someone relatively new to knitting.

Ribbing done with 5mm wooden circulars

Body done with 6mm plastic circulars
I made the vest in size 6, which turned out true to size. I did a little bit of messing around with needle sizes to obtain gauge on this one. I generally consider myself a bit of a “tight” knitter, so it wasn’t a surprise that I needed to size up the 4.5 mm needles to 5 mm needles. I was a bit surprised that I was able to use 6mm needles to obtain gauge in pattern, though. I think this is likely because I only had plastic circulars of that size, and my gauge is often looser on plastic.
It’s possible my yarn choice also had something to do with the gauge. The pattern calls for Drops Kid Silk or Drops Flora held together with Drops Air. Unfortunately for me, I’m allergic to sheep’s wool, which is used in both Flora and Air. Instead of using Drops yarn, I fell back on my favorite acrylic, Joann’s Big Twist. Theoretically the thickness of the yarn should match up, and since my gauge didn’t need too much adjusting, I assume the difference in yarn weight is negligible.

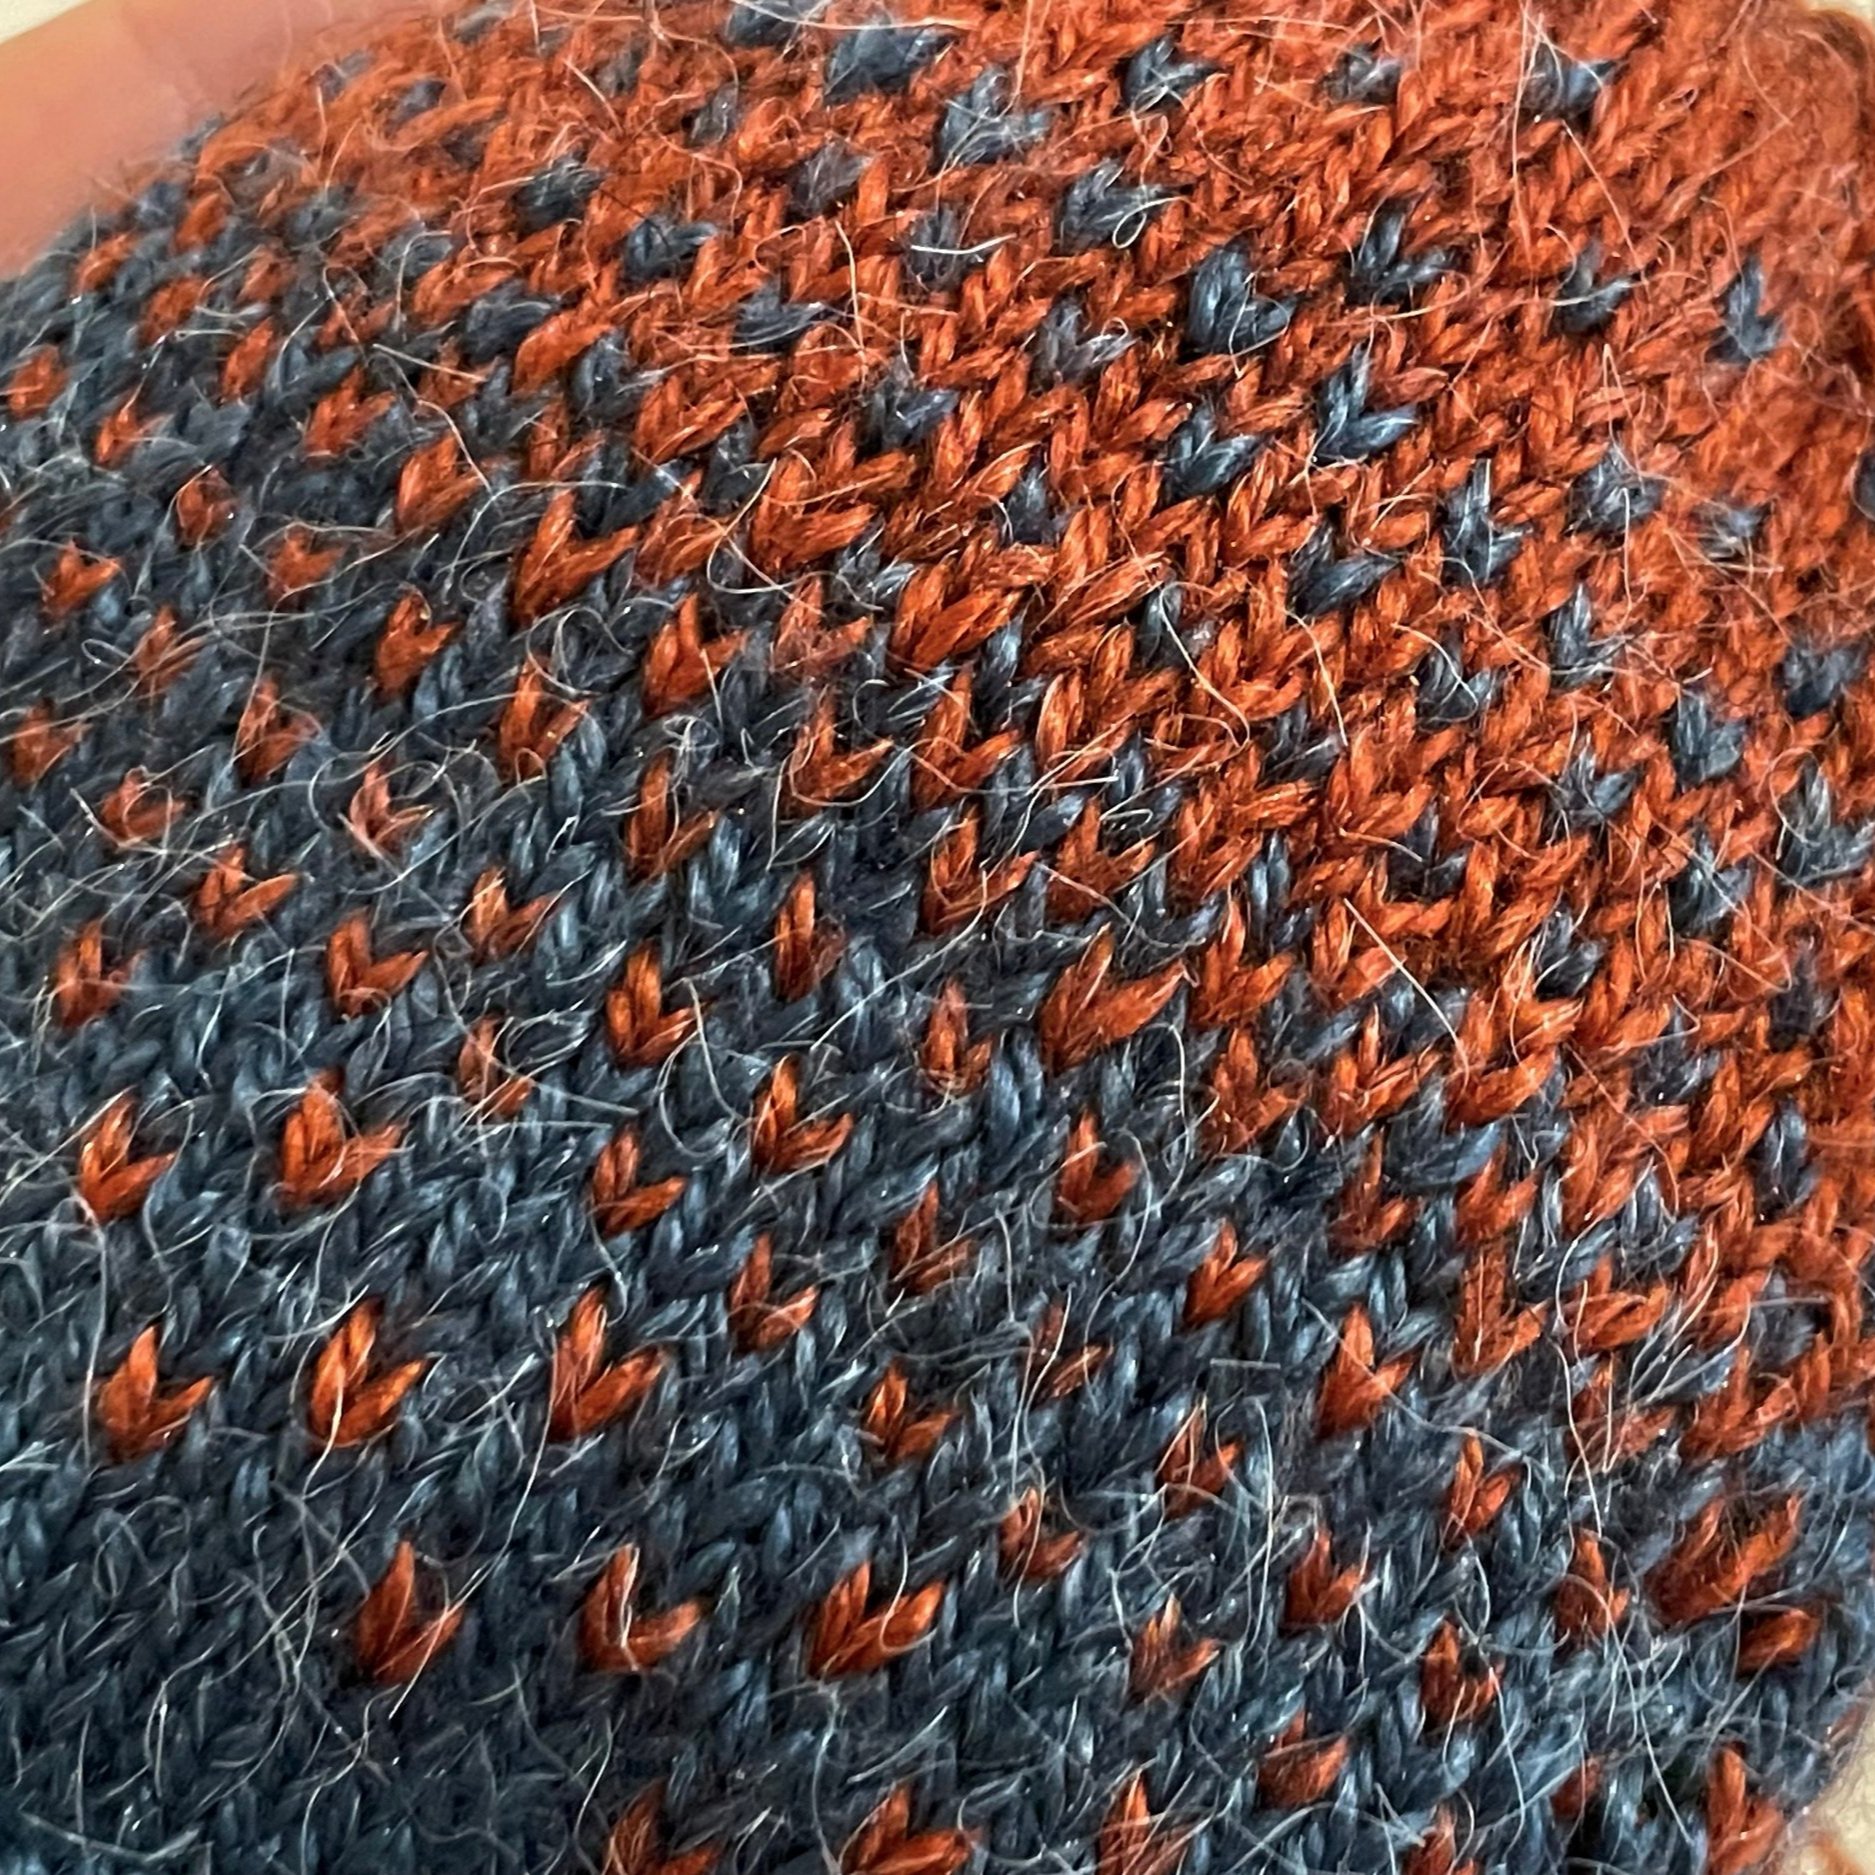
I only made two deviations from the pattern for this project. The first one is pretty obvious, especially if you’ve already clicked through to look at the pattern (which you should do!). I opted to use intarsia in the round to make a large check pattern in this vest. I’ve used this technique on other projects and knew it would make little difference in regards to the actual pattern of the vest. The fit and texture stays the same, the only thing that changes is the color - and the amount of ends I need to weave in!


The other change I made, while technically an option in the pattern, still bears a mention. When picking up the ribbing for the sleeves, I picked up maybe 10 stitches less than the pattern recommended for my specific size. In the photos above, you can see how the fit of the vest changed with the ribbing. I believe the gaping in the armholes was caused, in part, by my sloped shoulders. In general, I dislike making myself wearables because my shoulders and arms are very hard to fit. I always have to make changes. This pattern is great because reducing the number of stitches in the ribbing was such a minor change, and the only change I had to make to the fit. With sweaters I usually have a bit of a nightmare process where I have to modify the shoulder, the armhole and the sleeve width. This was considerably easier.

Let’s get a closer look at that shoulder seam!

The last thing I wanted to mention about this vest was a new-to-me technique, the three-needle bind-off! It was used in the shoulders of the Belle Vest and I absolutely love the results! It looks super crisp from the outside, and on the inside it is very neat, looking almost like a chain stitch. I’m definitely adding this to my repertoire of preferred cast offs.
The Belle Vest was such a quick make, with such a beautiful result, it’s really made me want to make more vests!! I’ve been wearing it nonstop since I took it off the needles. Did you know Rita has another vest design in her pattern portfolio? Be sure to check out her designs, and let me know what you make!
Happy crafting!
Needle & Yarn Charts

Wondering what some of these tools are? Check my youtube to watch me ramble about tools for half an hour!
I have long been frustrated by the crochet hook, knitting needle, and yarn weight size charts that are available online. I have tried to remedy some of the issues I have by making my own charts. Hopefully these are easy to read and fairly comprehensive, but I am always open to suggestions to make them better!

Simply click on either chart to be taken to a downloadable version!

Feels Like Alpaca!
While I was in New Zealand, my girlfriend picked out some yarn so that I could make her parents some hats for Christmas. Something about making winter gear for a summer holiday seemed odd to me but I wasn’t about to pass up a chance to do some knitting! She picked out Lion Brand’s new Feels Like Alpaca in Denim and Rust.
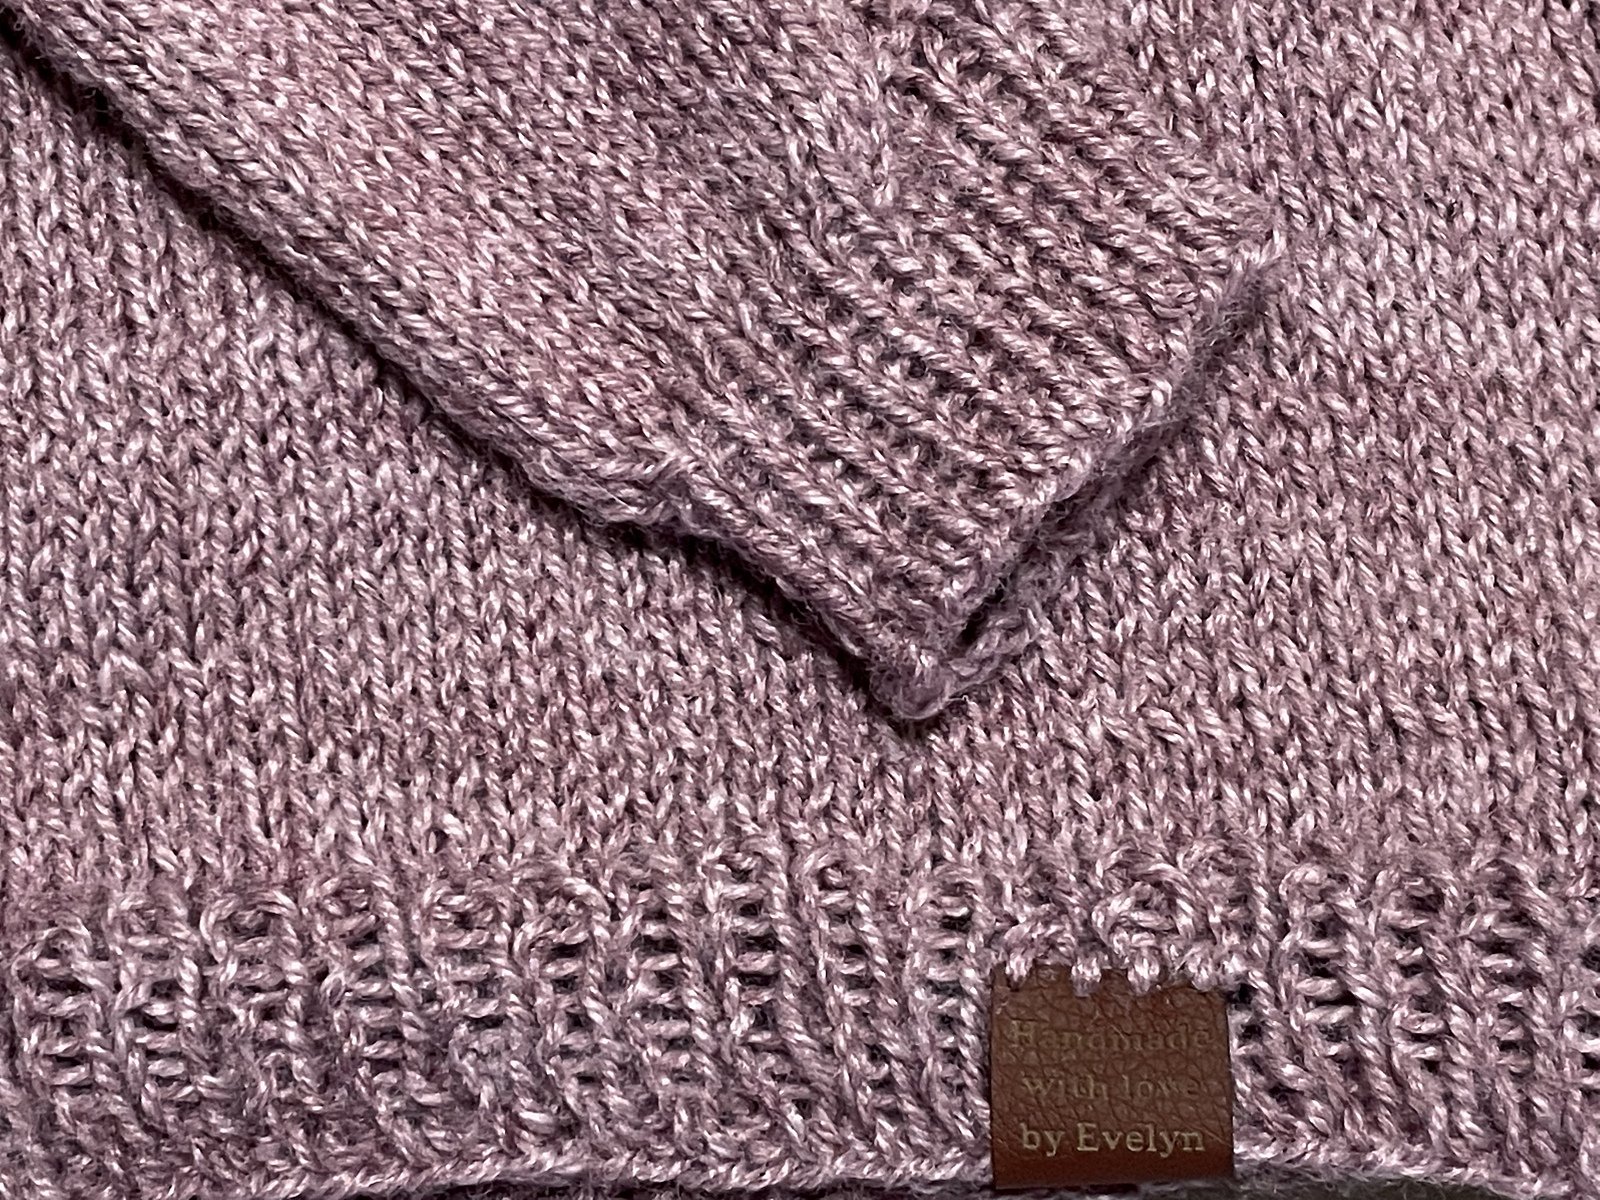
Flax by tincanknits made using Lion Brand’s Re-Spun in Blush
This yarn is new to me, and I also believe new to Lion Brand. I don’t usually go for Lion Brand yarns, although I can be caught admiring the pretty colors in their Mandala line from time to time. The last time I bought Lion Brand, it was their 100% recycled polyester Re-Spun yarn in Blush. That yarn was super pretty - it had a nice drape, good stitch definition, and appears to have held up pretty well in the (machine) wash over time.

Rust


Denim
The Lion Brand Feels Like Alpaca yarn is another hit! It feels surprisingly close to alpaca! I think it definitely looks like alpaca, and feels very soft. I’m not sure if it’s just because I touch so much yarn, but it does feel synthetic to me. Without the label, I’d assume it was some kind of alpaca blend. With the label, I know that it is 87% acrylic, 7% polyester, and 6% nylon. It’s also machine washable, which is a big plus in my book!
I found this yarn to be a bit slipperier than most synthetic yarns I use, although I found it would catch on the lettering of my DPNs. I used Crystal Palace size 3 (3.25 mm) bamboo needles for the entirety of both of the hats that I made. I found that it was fairly easy to undo stitches, but was a bit prone to being split with a knitting needle while working with it. Despite the yarn being fuzzy I still felt the stitch definition was pretty good - better than most alpaca I’ve worked with. I assume this has something to do with the synthetic nature of the fibers.

Rainbow Indigo Fisherman's Beanie by Janet Stimson made using Lion Brand’s Feels Like Alpaca in Rust

Cengkeh Beanie by Amelia Putri made using Lion Brand’s Feels Like Alpaca in Denim
Would I buy it again? Probably! I really like the feel and look of this yarn, and I do like the Burgundy colorway a lot! The only issue I’m seeing is that the color palette isn’t super varied. Every color is gorgeous, but I would love to see a green, or a brown, or more of a true red or purple. If there was a dark slightly desaturated purple it would already be in the mail on its way to me.

Bonus hat for the girlfriend made using Lion Brand’s Feels Like Alpaca in Rust and Denim
This hat is mostly my own pattern, but uses the colorwork chart from The Easy Ombre Slouch Hat by Paul S Neary
Possum Yarn
I’ve just got back from New Zealand! There’s many exciting things to say about that but what I’m focusing on here is a specific yarn I found.

New Zealand is famously known for their sheep. They’re a large exporter of both meat and wool! Pretty much any ride through the country will reveal gorgeous hills covered in sheep.
Unfortunately for me, I have an allergy to sheep’s wool. Fortunately, New Zealand has a slightly lesser-known, unique fiber that they use for yarn: possum.


It is a little tricky to find possum yarn that isn’t blended with sheep’s wool, but I was lucky enough to find Zealana’s Air yarn at Knit World in Wellington. Possum fur has pretty short fibers and needs to be combined with other fibers to create a better yarn. This yarn is blended with cashmere (goat!) and mulberry silk.
Zealana’s site does a much better job of explaining it, but possums here are pests. The brushtail possum is native to Australia but invasive to New Zealand. They cause a lot of damage here by eating native bird species’ eggs out of their nests and by destroying native plants.
I personally prefer to work with yarn in the DK-chunky range, so lace weight was new to me. I scoured ravelry for a while before settling on the Fir Cone Cap by Sarah Pop. The yarn is very soft, and quite slippery so I opted for a pattern that used a needle size larger than what I had on hand. That is to say, I knit this hat using US size 3 (3.25 mm) needles.

If you can see my mistake in the brim, no you can’t
The asymmetrical brim was neat and looked pretty, although likely not something I’d personally do again. I generally prefer hats that don’t have a designated “front” or “back” because I will always inevitably put them on sideways. The lace was absolutely lovely. I’m not sure if I’ve ever done “true” knit lace before, but this pattern was super easy to memorize and worked up very quickly.
I opted to make the medium length hat, because I liked how that was sitting on my head while I was trying it on. My head is a bit on the smaller side and I prefer just a bit of slouch.
After wearing the hat about for a couple days, I have determined that this is probably the warmest fiber I’ve had the pleasure of working with. I was concerned that it would be rather insubstantial because of how light and delicate it felt, but found myself surprised and sweaty on most days. I think the possum hat might be a bit better for Chicago winters than New Zealand spring!


New Site!
Welcome to the new website for Elv Needleworks!
I had held on to the old name of “Sammich Sewing” for a long time, but I felt it no longer represented me or the products I am making. Back in 2012, when I started my first website, I thought that my primary focus would be sewing, fashion, and costuming. However, as my brand grew and changed, I always found myself changing mediums to suit whatever project I had in mind at the time. I have crochet, knit, quilted, sculpted, and so much more. I no longer focus just on garment making, but do tend to focus a bit more on needle made crafts.
I’m excited to share all the things I’m working on, as well as some crafting tips and tricks that I’m picking up along the way!

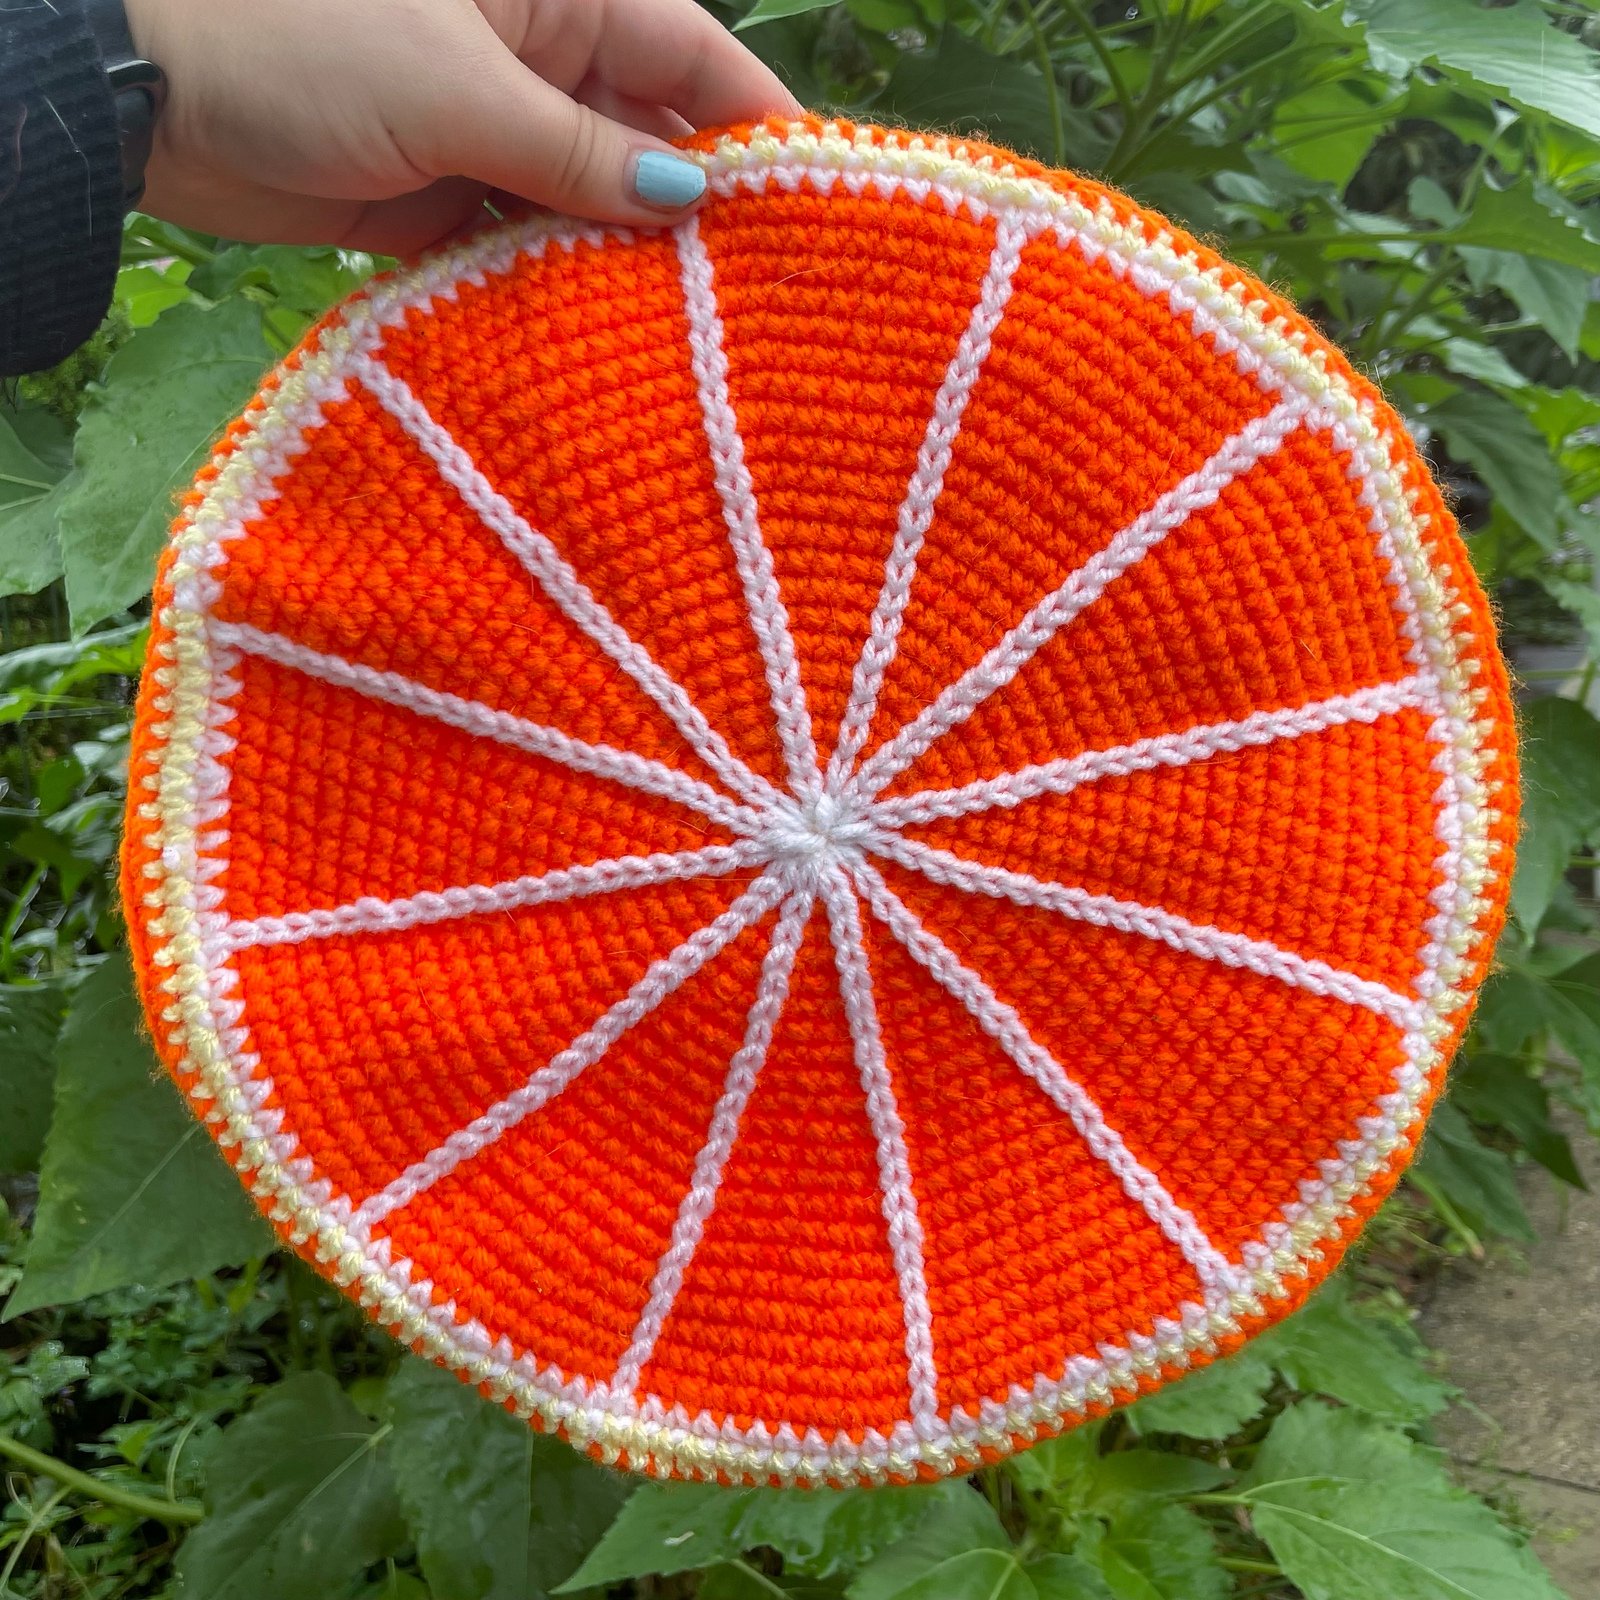
Citrus Beret

New Pattern Alert!!
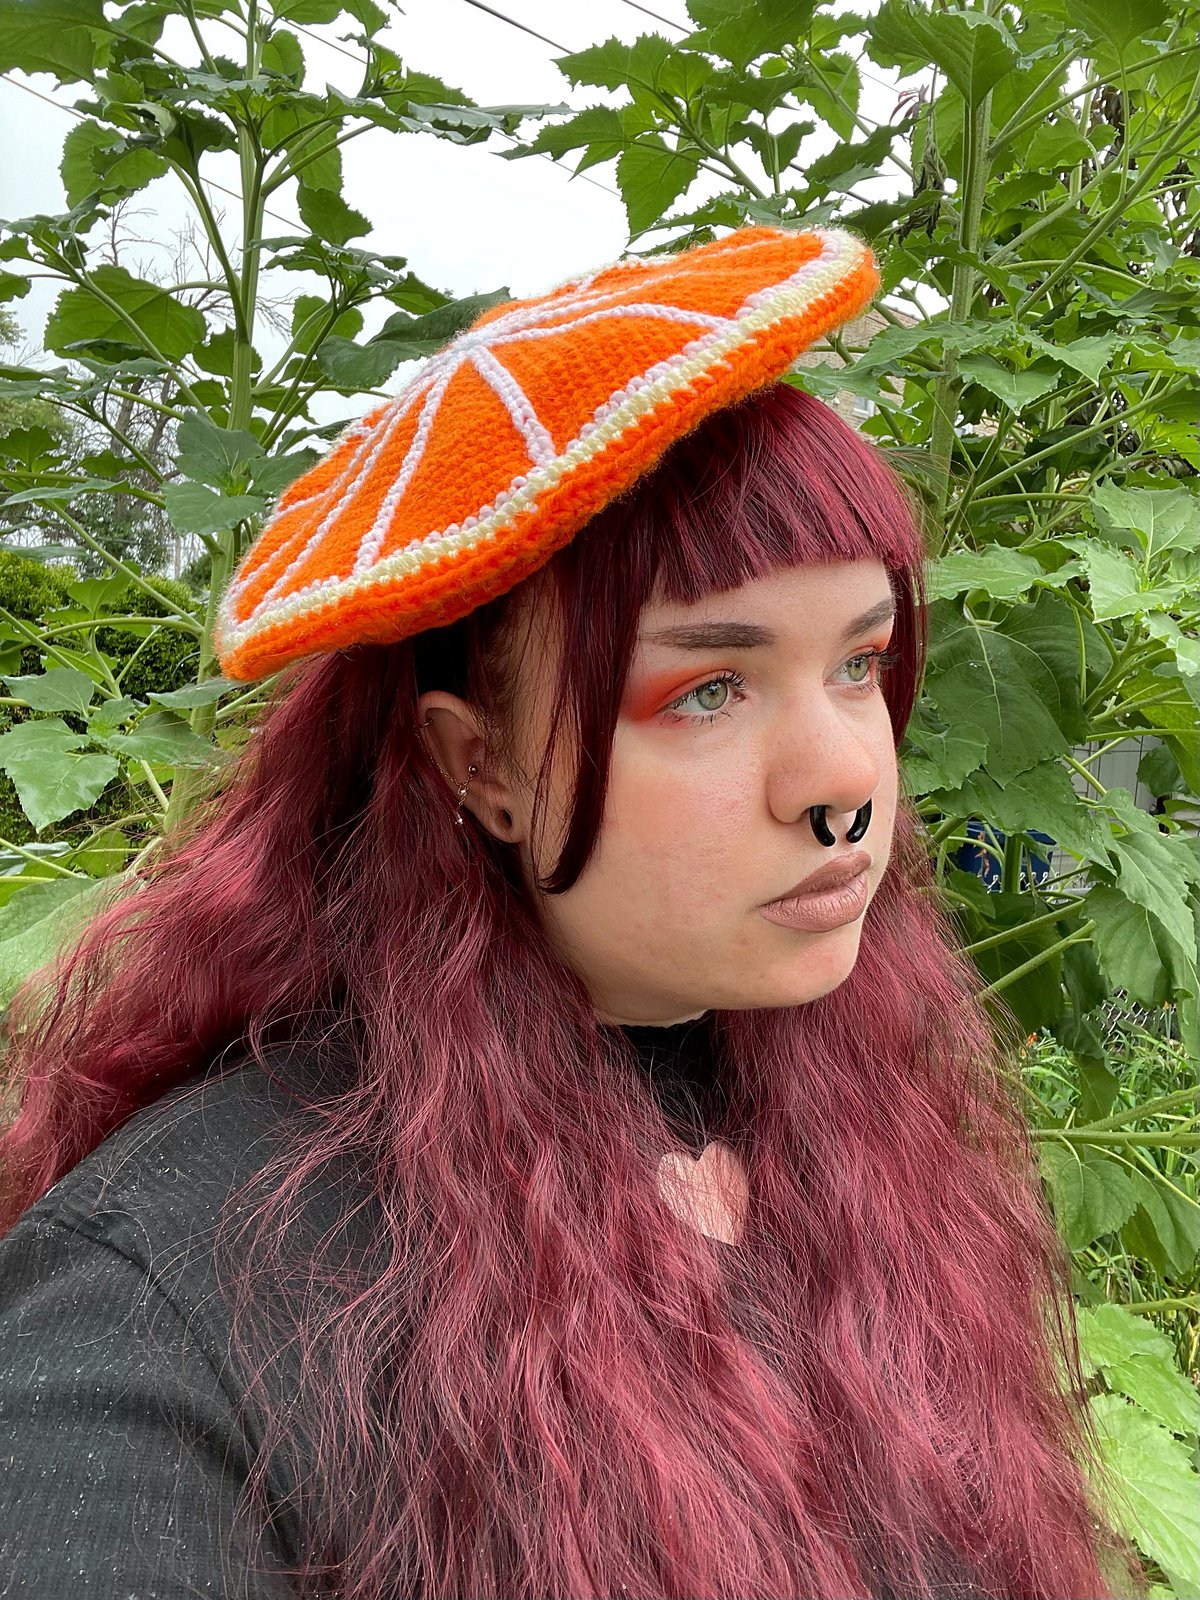
The Citrus Beret is based on, well, citrus! This hat features a segmented design reminiscent of the inside of a sliced citrus fruit, with a textured underside meant to evoke the peel.
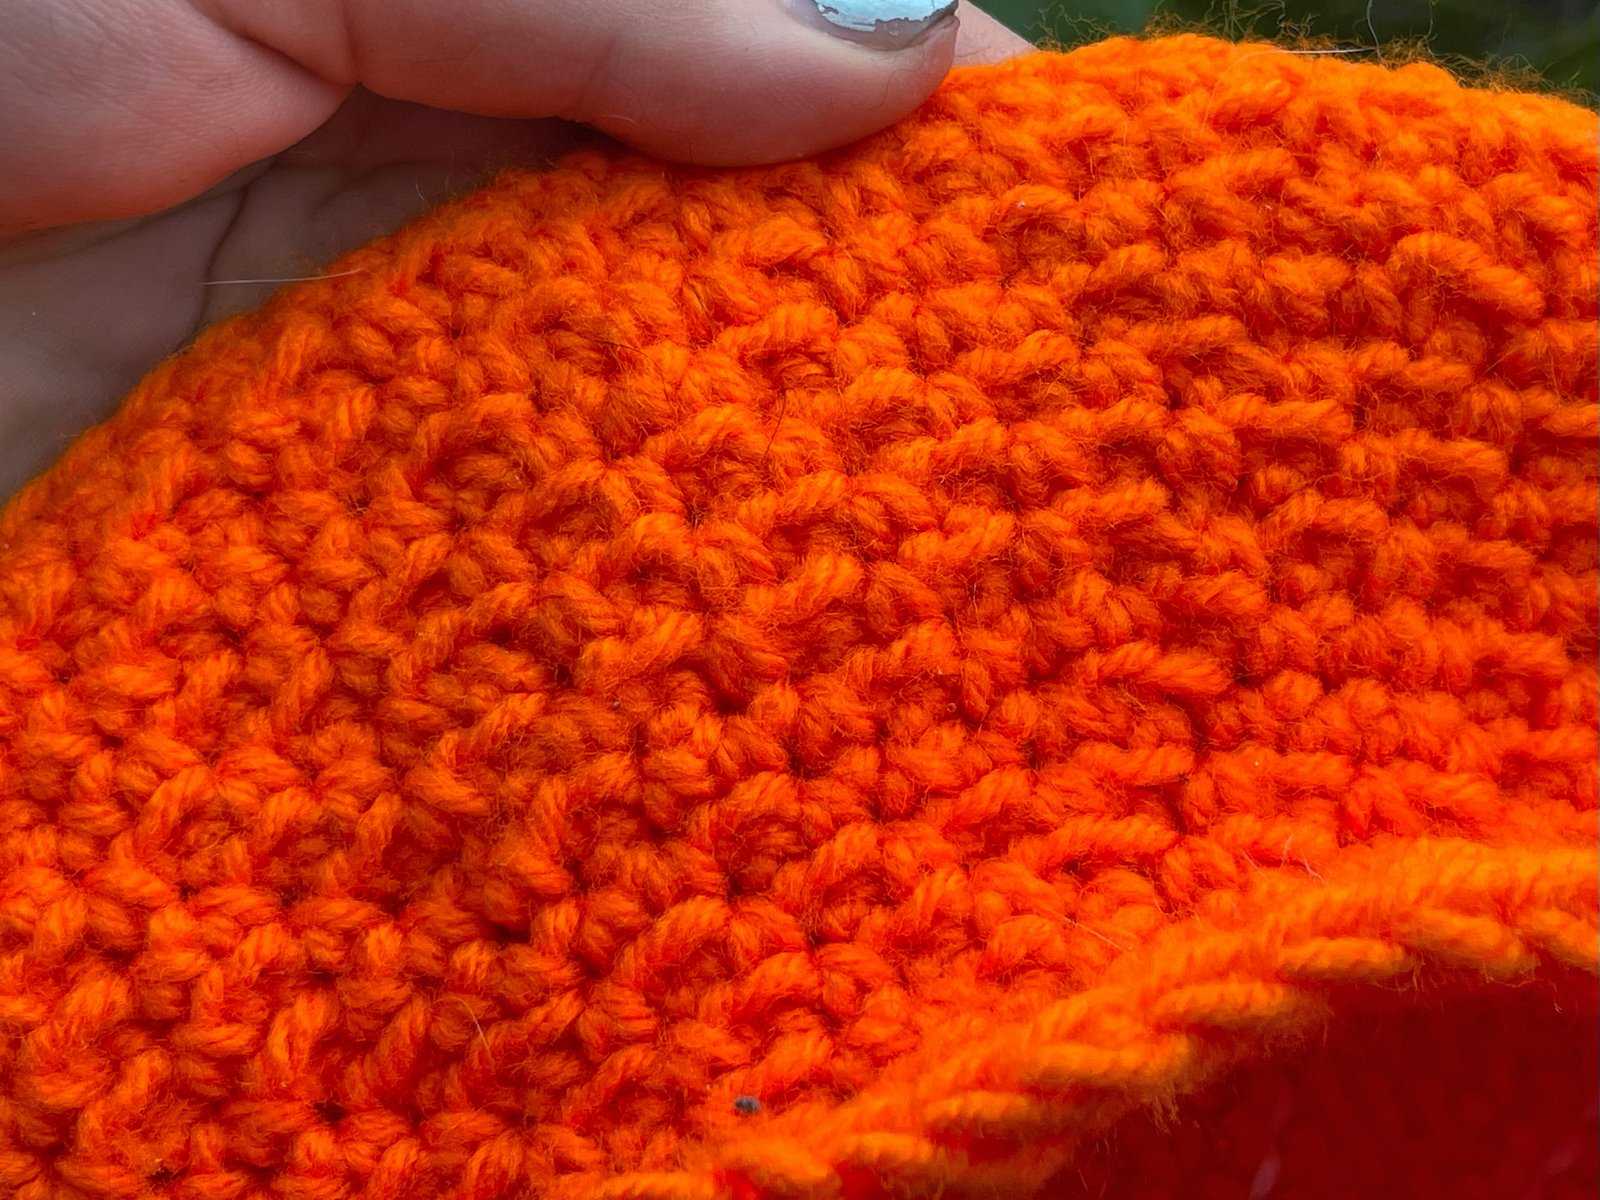
This hat is worked in the round, some details are worked directly onto the top of the hat, no sewing required!